How to install Click Shelving
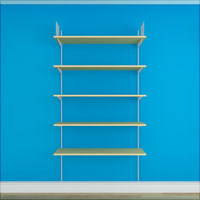
Spacing of Uprights
|
The distance between uprights should be decided in relation to (a) anticipated loading, (b) rigidity of shelf material, and (c) strength of wall fixings. As a general rule, the greater the loadings and/or the more flexible the shelf material, the closer together uprights should be spaced. Typical spacing for general use is between 600 and 900mm - i.e around 750mm. |
Fixing Uprights
|
Place upright in position on the wall, and mark position of top hole (which is about 75mm from the top of the upright). Drill wall using No.8 (5mm) masonry drill, to 38mm depth. Screw loosely through top hole, using 1½ " No.8 roundhead wood screw and No.8 wall plug. Check that upright is vertical, and tighten top screw. Drill through other holes in upright (starting at the bottom) and secure, making sure that the plugs are at least 6mm beneath the wall surface. Fix the next upright, measuring to ensure that it is parallel with the first. |
Wall Fixings
|
Secure fixing to the wall is essential, especially when uprights are widely spaced. For fixing to solid plaster or masonry, fibre plugs are the most convenient, as they can be inserted through the holes in the uprights. For plasterboard or other cavity walls, however, special cavity fixings should be used. If there is doubt about the security of the fixings, it is good practice to raise the height of the uprights in order to to locate two fixing points above the top shelf. Do not position load-bearing brackets higher than the top fixing screws. |
Fixing Brackets
|
To fix a bracket, press it into the upright channel at 45° until it "CLICKS", making sure that both projections (Y) are located behind the lips (X). |
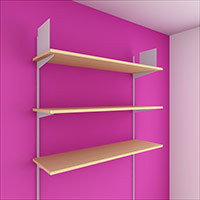
Alignment of Shelves
|
Start with the lowest shelf, and make sure that it is level. A spirit level can be used, but a 'visual' check is often more satisfactory, as this allows for building irregularities.Taking the bottom shelf as a reference line, fix the other brackets at the desired height. Bracket positions can be marked on uprights with a pencil when measuring. |
Fixing Shelves
 |
It is not always necessary to fix shelves to brackets, as the weight on the shelf will often be sufficient to hold it in position - but it is essential where two shelves are being joined end-to-end on a single bracket. To fix a shelf to brackets, insert nurgle in slot at side of bracket, place shelf in position, and mark position of nurgle-hole with a pencil. |
Cover Strip
 |
The cover strip (if supplied) snaps into the front of the upright. It can be cut to length with a fine saw or scored with a sharp knife and broken. Cables such as telephone or speaker leads may be run inside the upright channel, and behind brackets; but should only be added after brackets are in place. Brackets should preferably not be added or adjusted with wiring in place. Routing power leads through Click uprights is not recommended. |